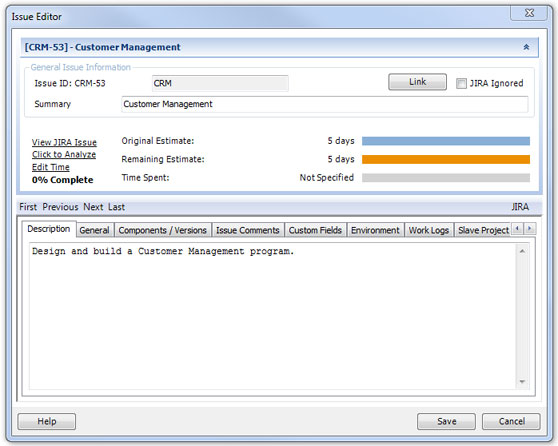
Issue Editor
This issue editor is a dialog provided by The Connector for quickly and easily editing all of the information related to the issue in one place. From this dialog, you can also send and update the information from JIRA (by clicking where it says JIRA in the middle right side). From this window, all the attributes of the task/issue can be adjusted including all the custom field values, versions and components, sub-task information, and slave issue links. You can navigate from one issue to another using the First, Previous, Next, and Last options.
To exclude an issue from the JIRA sync, check the JIRA Ignored option in the upper right corner. If this option is chosen, this specific task will be skipped over whenever a JIRA data exchange is performed.
You may also use the View JIRA Issue link to directly go to JIRA to view more details about the issue.
The Edit Time and Click To Analyze options deal with the time / duration of the task.
Description
The Description text box on the first tab of the issue editor allows a place for you to modify the issue description. This information is stored in the "Notes" field of the Microsoft Project task and can also be edited through that screen.
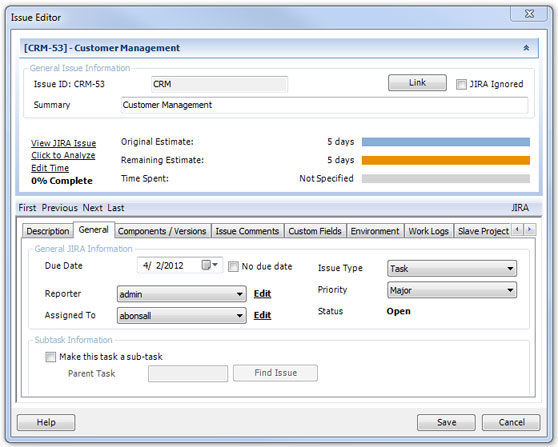
General
Under the General tab of the issue editor, you can modify all of the basic properties of the issue such as its type, priory, status, assignee, and due date.
If you wish to make this task a sub-task, this can also be set from this screen (See the Working With Sub Task section for more information).
Components / Versions
The Components / Versions tab of the issue editor will allow you to select which components, affects versions, and fix versions with which the issue is associated.

You will only see this option if it is enabled in the settings tab of the configuration screen. Select the desired components and versions, and when the issue is synchronized with JIRA, this data will be transmitted and updated.
Issue Comments
The Issue Comments tab of the issue editor will allow you to quickly view any comments that exists in JIRA for the current issue you are working with. Note: If you are creating a new issue that currently does not exist in JIRA yet, you will not be able to access any comments.
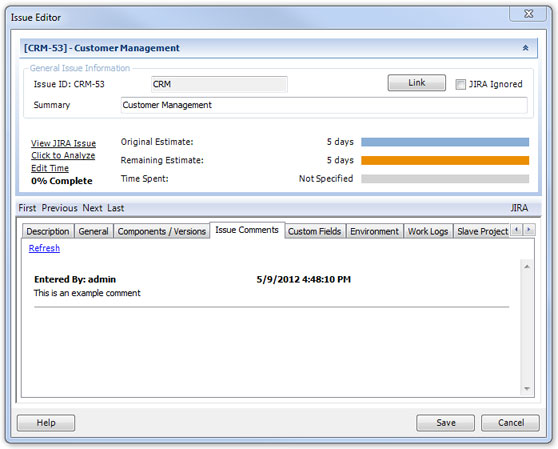
Clicking on Refresh will do an immediate query to JIRA to update the comments listed.
Custom Fields
The Connector supports Custom Fields in JIRA and allows you to exchange this information in both directions. From the Custom Fields tab of the issue editor you can view and set the values for custom fields. Most of the standard JIRA custom fields are supported by The Connector and allow for their native types to be edited through The Connector.
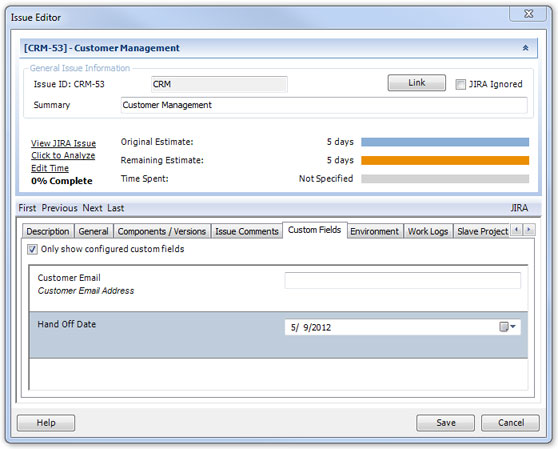
If your custom field is a multi select list box, The Connector shows you a multi select list box and allows you to select multiple values. Date/time fields are shown in The Connector using the Windows date selector.
Only show configured custom fields - Your JIRA instance can have more custom fields setup than you wish to use in The Connector. If you only configure The Connector to use 3 of those custom fields, checking this option will limit the fields you see to the configured fields. This is useful if you have a large number of custom fields setup in JIRA but don't want or need to see them from within Microsoft Project.
Environment
The Environment tab of the Issue Editor will allow you to edit the environment value of the JIRA issue. This tab is only visible if you have enabled this option through The Connector's configuration dialog.
NOTE: You CANNOT use tab or carriage returns in the environment field and you can only store 255 characters. This is a limitation to the storage location in Microsoft Project.
Work Logs
The Work Logs tab of the issue editor will allow you to quickly view any work log detail that exists in JIRA from the current issue you are working with. Note, if you create a new issue that currently does not exist in JIRA yet, you will not be able to access any work logs.
Slave Project / Issue
If you have the slave project / issue option enabled, this tab will allow you to specify the issue ID and project of the slave issue. A slave issue is simply a secondary issue that gets updated at the same time as the master issue effectively causing two JIRA issues to be updated with the same information during the Send To JIRA process.