Custom Date Formatting
This option allows you to configure the date format for JIRA and Microsoft Project if you are using non-English versions of either.
The setup for this is found on the JIRA Profile (Configure – Highlight JIRA instance and click Edit). Click on the Configure Custom Date Formatting link.
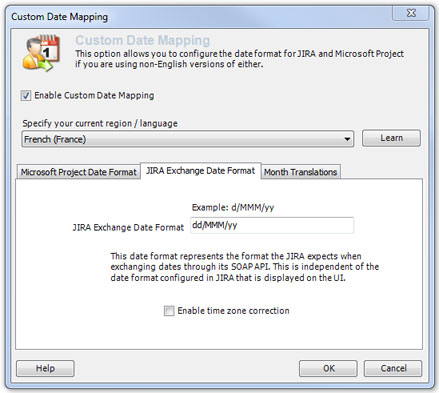
In order for The Connector to use these option you must check the Enable Custom Date Mapping box. Your current region/language setting should be displayed in the Specify the current region / language.
The Microsoft Project Date Format tab asks for the date format that is used within Microsoft Project. This date format represents the format you wish to have dates formatted in Microsoft Project. This will typically be the format you have Microsoft Windows configured for, but it can be different if desired.
The JIRA Exchange Date Format tab has the date format that represents the format that JIRA expects when exchanging dates through its SOAP API. This is independent of the date format configured in JIRA that is displayed on the user interface.

The Enable time zone correction option is available to adjust for daylight savings time if date/time transfers to JIRA is off by an hour.
The Connector can assist in determining what value should be entered in the JIRA Exchange Date Format. The Learn button will try to determine this format for you. Click on the Learn button.
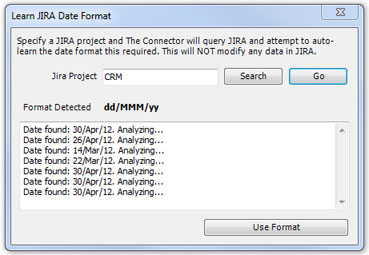
To Specify the JIRA project click on the Search button and choose the project from the list. Then click on GO. The Connector will analyze all tasks attached to this project and find any Custom-Date Picker type fields and determine the format. Click the Use Format button to fill the Format Detected into the JIRA Exchange Date Format.
The Month Translations tab is where the abbreviations for each month of the year are setup. Clicking the Set Months button will set those abbreviations based on the defaults for the language that Microsoft Project is set to.
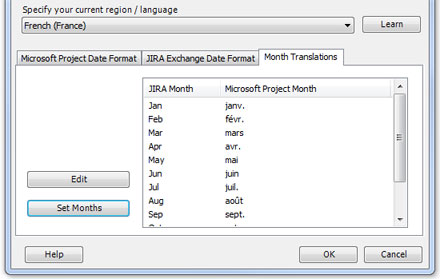
Click the Edit button to adjust these values to something other than the default. Click OK to save these settings.